
Table of Contents
- What You'll Need: At-Home Keratin Treatment Tools
- Step 1: Preparation and Clarifying Shampoo
- Step 2: Sectioning and Applying the Keratin Treatment
- Step 3: Drying and Flat Ironing Techniques
- Safety Precautions: Ventilation and Chemical Compatibility
- Keratin Treatment Aftercare Tips for Lasting Results
- How Long Does At-Home Keratin Last?
- Troubleshooting Failed Results and Common Mistakes
- Frequently Asked Questions
Last Updated: September 21, 2026
What You'll Need: At-Home Keratin Treatment Tools
Applying an at-home keratin treatment safely starts with the right tools. A formaldehyde-free keratin kit and a few basic supplies are enough to get salon-quality smoothing without dangerous fumes.

Here's what to gather before you start:
- Formaldehyde-free keratin kit with pre-treat shampoo, treatment, and post-mask
- Clarifying shampoo to strip buildup before you begin
- Application brush for even saturation
- Fine-toothed comb to spread product through mid-lengths to ends
- Sectioning clips to keep hair organized
- Protective gloves to shield your hands
- Ceramic straightener with adjustable flat iron temperature
- Blow-dryer for the rough-dry step
Step 1: Preparation and Clarifying Shampoo
Preparation decides your result. Wash hair with a clarifying shampoo to remove oils, silicone, and product buildup so the keratin can bond.
Follow these steps:
- Shampoo twice with clarifying shampoo. Rinse well.
- Skip conditioner entirely. It coats the strand and blocks absorption.
- Towel-dry, then blow-dry until hair is 100% dry.
- Do a strand test first if your hair has chemical processing or damage.
Step 2: Sectioning and Applying the Keratin Treatment
Even application is the difference between smooth results and patchy ones. Work in small sections and saturate each strand from mid-lengths to ends.
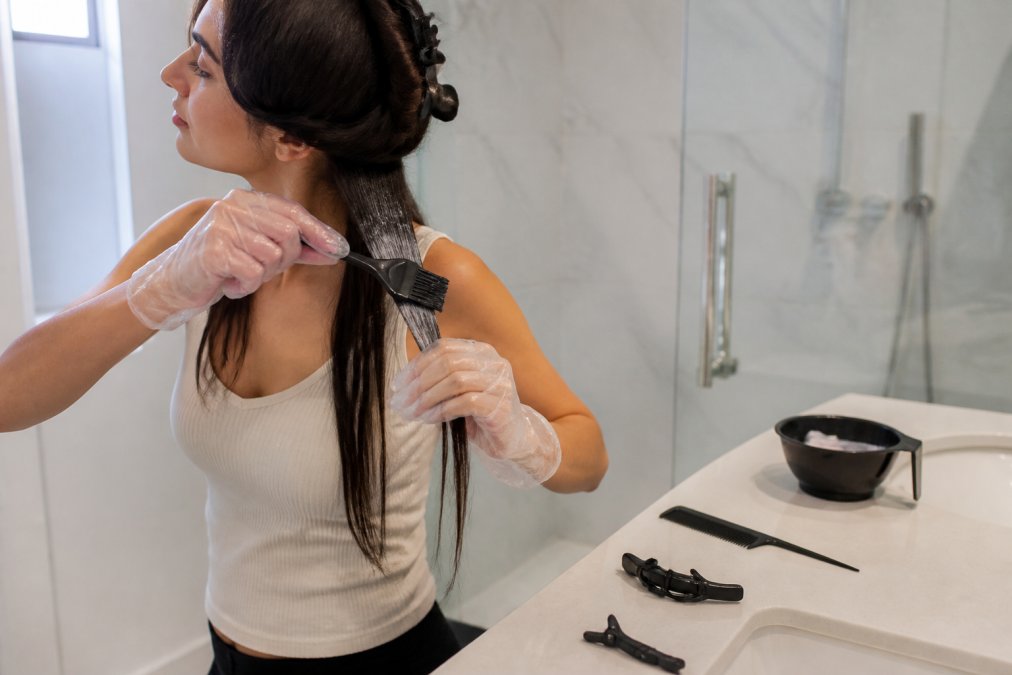
Here's the process:
- Divide hair into 4 sections with clips.
- Put on protective gloves before you open the bottle.
- Apply with the brush, starting at the nape and working upward.
- Keep product off the scalp. Start a half-inch away.
- Comb through each section to spread it evenly.
- Let the product sit for about 10 minutes.
Step 3: Drying and Flat Ironing Techniques
Heat seals the keratin into the cuticle. Blow-dry first, then flat iron in thin sections at a controlled temperature.
Follow this sequence:
- Blow-dry each section until fully dry. No damp spots.
- Set your flat iron between 350°F and 400°F for normal hair.
- Use lower heat (300°F to 350°F) for fine, damaged, or color-treated hair.
- Pass the iron 5 to 7 times per section in slow, even strokes.
- Work in thin sections, no wider than one inch.
Safety Precautions: Ventilation and Chemical Compatibility
Safety comes down to two things: clean air and knowing what's already in your hair. Even formaldehyde-free formulas release some vapor during application and flat ironing, so ventilation is not optional, and the ingredient list matters more than the front-of-bottle claim.
Ventilation and Air Quality
Set up your space before you open the bottle:
- Open a window and place a box fan so it pulls air away from you and toward the window, not across your face.
- Run a second fan at floor level if the room has no cross-breeze. Stagnant air lets vapor pool around your head.
- Never treat hair in a small, closed bathroom. A typical bathroom has little air exchange, so vapor concentrates fast.
- Keep the door open to the rest of the home and keep children and pets out of the room for the full session.
- Wear gloves the entire time, and consider a fitted N95 or a well-ventilated room if you are sensitive to fumes.
- Take breaks between sections and step into fresh air if you feel lightheaded, dizzy, or notice throat or eye irritation. Stop entirely if symptoms persist.
The OSHA guidance on formaldehyde exposure limits sets the workplace air standards that salon products are measured against. Home users should treat ventilation with the same seriousness, because a home bathroom has far less air turnover than a salon.
ORGANIC KERATIN DIY TREATMENT SET →
Read the Label, Not Just the Claim
"Formaldehyde-free" is a marketing term, not a regulated one. Formulas can still contain ingredients that release formaldehyde as they heat. Look at the ingredient list and know the common ones:
- Methylene glycol and formaldehyde releasers, these can liberate formaldehyde vapor when the flat iron hits them.
- Glyoxylic acid, a common formaldehyde-free smoothing active. It works by cross-linking proteins rather than releasing gas, so it is generally the safer choice for home use.
- "Formalin," "methanal," and "formic aldehyde", older names for the same family of ingredients.
Chemical Compatibility and Strand Testing
- Snip a small section of hair from an inconspicuous spot.
- Apply the product and process it exactly as you would on your full head.
- Watch for breakage, gumminess, a gummy stretch, or an odd texture over the next two days.
- If the strand snaps, feels mushy, or changes color, do not proceed.
If you are unsure whether your hair is compatible, book a consultation with a licensed stylist before you buy a kit. A strand test costs nothing; a corrective cut does not.
Keratin Treatment Aftercare Tips for Lasting Results
Aftercare keeps the smoothing effect intact. The wrong shampoo strips the treatment in days.
Follow these aftercare tips:
- Wait 72 hours before the first wash. Let the keratin fully set.
- Use sulfate-free shampoo and conditioner only.
- Wash less often, two to three times a week.
- Skip salt-based sprays and clarifying shampoos.
- Add a weekly mask with argan oil to lock in moisture.
- Use heat protection before any hot tool.
How Long Does At-Home Keratin Last?
At-home keratin can last for several months, depending on your hair type and aftercare.
Several factors change the timeline:
| Factor | Shortens Results | Extends Results |
|---|---|---|
| Shampoo type | Sulfates and salts | Sulfate-free formulas |
| Wash frequency | Daily washing | 2-3 times per week |
| Heat styling | High heat, no protection | Low heat, thermal spray |
| Hair porosity | High porosity | Low to medium porosity |
| Touch-up routine | None | Weekly argan mask |
Troubleshooting Failed Results and Common Mistakes
Failed results almost always trace back to one of a few variables: temperature, saturation, section size, or timing. Work through the causes in order rather than guessing.
Diagnose by Symptom
- Patchy smoothing (some sections smooth, others frizzy): You missed sections or applied unevenly. Next time, work in sections no wider than one inch and comb each one through before moving on.
- Still frizzy overall: The flat iron was too cool, or you passed too fast. Raise the temperature in 25°F steps toward the top of your hair's range and slow the passes. A cool iron leaves the cuticle open, so frizz returns within a wash or two.
- Stiff, greasy, or weighed-down feel: You over-saturated. Product should coat the strand, not soak it. Use less per section and comb the excess through to the ends.
- Fast fade (gone in a week or two): You washed too soon, used a sulfate or clarifying shampoo, or the iron never sealed the cuticle. Wait 72 hours before the first wash and switch to sulfate-free products.
- Breakage or a gummy, mushy feel: You skipped the strand test on chemically processed hair, or you applied over a recent relaxer. Stop, do not reapply, and give the hair a protein-free moisture break.
- Scalp irritation or burning: Product touched the scalp. Keep application a half-inch away from the roots and rinse thoroughly if it contacts skin.
The Mistakes That Cause Most Failures
- Rushing the flat iron step. Slow, thin passes seal the cuticle. Fast passes over thick sections do nothing but add heat damage.
- Applying to damp hair. Water dilutes the formula and stops it from sealing. Blow-dry until there are no damp spots.
- Skipping the clarifying wash. Oils and silicone block absorption, so the keratin sits on top and washes out.
- Using too much product. Over-saturation slows drying and leaves a stiff film.
- Washing too soon. The treatment needs about 72 hours to fully set.
- Ignoring the strand test. This is the single biggest cause of breakage on color-treated or relaxed hair.
If a Treatment Fails
Wait two weeks before reapplying. Give your hair a protein-free moisture break first, a hydrating mask without keratin or protein, then strand test again before the full process. Reapplying over a failed treatment without a break compounds the damage and rarely fixes the result.
Frequently Asked Questions
Can I do a keratin treatment myself at home?
Yes, you can do a keratin treatment at home with a formaldehyde-free kit. Choose a complete set like the Kerarganic DIY Organic Keratin Set ($75.60 for 4oz bottles), which includes pre-treatment shampoo, the keratin system, and a post-treatment mask. Follow the steps carefully: clarify, section, apply, dry, and flat iron. At-home treatments work best on hair that isn't severely damaged. If your hair is over-processed or breaking, see a professional first.
Is it safe to do keratin treatments at home?
At-home keratin is safe when you use a formaldehyde-free formula and follow safety steps. Work in a well-ventilated room, wear protective gloves, and avoid getting the product in your eyes. Formaldehyde-free options like Kerarganic's Organic Keratin System use glyoxyloyl carbocysteine instead of formaldehyde, so they don't release harmful fumes. Always do a strand test 48 hours before to check for reactions or excessive breakage.
How do I prepare my hair for an at-home keratin treatment?
Start with a clarifying shampoo to remove buildup, silicones, and oils. Wash twice, then towel-dry until hair is damp but not dripping. Do not apply conditioner. Detangle with a wide-tooth comb. If you have hard water or heavy product buildup, use a chelating shampoo. Your hair should be clean and product-free so the keratin can absorb evenly. Section hair into four parts before you begin applying the treatment.
What are the risks of using DIY keratin treatments?
The main risks are uneven results, heat damage from improper flat ironing, and allergic reactions. Formaldehyde-free formulas are safer, but you still need to do a strand test. If you flat iron at too high a temperature (above 450°F), you can scorch your hair. Without proper ventilation, even formaldehyde-free products can irritate your lungs. Always follow the kit instructions and never leave the product on longer than directed.