
Table of Contents
- What Is a DIY Keratin Treatment?
- Professional vs DIY Hair Smoothing: The Real Differences
- Cost Breakdown: DIY Keratin Treatment Worth It?
- At-Home Keratin Treatment Longevity and Results
- Keratin Treatment Safety Precautions for Home Use
- Common Mistakes That Ruin DIY Keratin Results
- The Verdict: When DIY Keratin Treatment Makes Sense
- Frequently Asked Questions
Last Updated: September 29, 2026
What Is a DIY Keratin Treatment?
A DIY keratin treatment is a chemical hair smoothing system you apply at home to reduce frizz, strengthen damaged hair, and create a sleek finish without visiting a salon. These treatments work by infusing keratin proteins directly into the hair shaft, restructuring the hair's protein matrix to seal the cuticle and lock in moisture.
The process typically involves three steps: a clarifying pre-treatment shampoo that opens the hair cuticle, the keratin treatment itself that deposits protein and smoothing agents, and a nourishing mask that seals everything in. At Kerarganic Cosmetics, LLC, we've designed formaldehyde-free keratin treatments specifically for at-home use, making professional results accessible without the salon price tag.

The appeal is straightforward: salon keratin treatments can cost several hundred dollars and require multiple visits for maintenance. Whether is diy keratin treatment worth the cost depends on whether you apply it correctly and deliver comparable results at a fraction of the investment. The real question isn't whether the product works; it's whether you're willing to invest the time and follow the specific application steps that determine success or failure.
Professional vs DIY Hair Smoothing: The Real Differences
The core difference between professional and DIY keratin treatments comes down to application precision and follow-up care, not the formula itself. A stylist has years of experience sectioning hair evenly, applying product at consistent thickness, and managing heat activation timing. You're learning this for the first time.
Professional treatments typically use the same active ingredients, hydrolyzed keratin, amino acids, and smoothing compounds, that formaldehyde-free at-home kits contain. Where salons justify their cost is in the controlled environment, product application expertise, and the guarantee that comes with their service. If something goes wrong, they fix it. If your DIY application goes wrong, you're left with over-processed or unevenly treated hair.
The application process itself demands attention. Professional stylists divide hair into precise sections, apply product evenly from root to tip, time the processing correctly, blow-dry to exact moisture levels, and flat iron at specific temperatures. Each step matters. A missed section or uneven application creates patchy results, some hair silky smooth, other sections barely touched.
Maintenance differs too. After a professional treatment, stylists recommend sulfate-free shampoos and specific aftercare routines. DIY users often skip this step, which cuts results short. The treatment lasts longer when you use the right products afterward. Many people invest in the treatment itself but then sabotage the results by using regular drugstore shampoo.
One honest advantage professionals have: they can assess your hair's porosity, previous chemical history, and texture before recommending treatment strength. They know whether your hair needs the standard formula or a gentler version. At home, you're making that call yourself based on general guidelines.
Cost Breakdown: DIY Keratin Treatment Worth It?
The financial case for DIY keratin treatment hinges on how many applications you'll do and how long results last. A single at-home treatment costs significantly less than a salon visit, but the math changes depending on your hair length and how often you retreat. Evaluating these recurring expenses requires a broader look at how professional-grade treatment costs compare to the long-term maintenance of other intensive hair and skin regimens.
Kerarganic Cosmetics, LLC offers several options. The compact DIY Organic Keratin Treatment Set with 2oz bottles costs $45.50 and covers one application for shoulder-length hair. The larger 4oz set at $75.60 handles longer or thicker hair in one application. For professionals or frequent users, the premium 32oz bundle at $273.20 provides enough product for multiple applications.

If your results last four to five months, the typical duration, you're looking at two to three DIY treatments per year, totaling roughly $90 to $225 annually for product alone.
The real cost-per-wear analysis depends on your styling routine. If you spend 45 minutes daily on heat styling, a keratin treatment that cuts that to 15 minutes saves you roughly two hours per week. Over a year, that's over 100 hours of your time. Whether that's worth $100 in product is a personal calculation, but many people find the time savings justify the cost immediately.
Where costs add up: if your first application fails and you need to retreat sooner than expected, or if you buy sulfate-free shampoos and conditioners to maintain results (recommended but not always done), the total investment grows. A failed DIY application can also mean a salon visit to fix it, which erases any savings.
The verdict: DIY keratin treatment is worth the cost if you have shoulder-length to mid-back hair, you're willing to follow application steps precisely, and you commit to maintenance. For very long or very thick hair, the cost per application increases. For short hair, DIY treatments are unquestionably cheaper.
ORGANIC KERATIN DIY TREATMENT SET →
| Hair Length | DIY Cost (Kerarganic) | Salon Cost | DIY Savings per Application | Annual DIY Cost (2-3 treatments) |
|---|---|---|---|---|
| Shoulder-length | $45.50-$75.60 | $250-$350 | $175-$300 | $90-$225 |
| Mid-back | $75.60 | $300-$400 | $225-$325 | $150-$225 |
| Very long/thick | $75.60-$158.60 | $350-$500 | $175-$425 | $150-$475 |
At-Home Keratin Treatment Longevity and Results
Results from a properly applied DIY keratin treatment last four to five months on average, matching what you'd expect from a salon application. The timeline depends on your hair's porosity, how often you wash, water quality, and whether you use heat styling tools afterward.
The first two weeks are critical. Your hair is still "locking in" the treatment. During this window, many people see the most dramatic smoothing and frizz reduction. Hair feels silkier, looks shinier, and styling time drops noticeably. After two weeks, results stabilize. You still have the smoothing effect, but it's no longer accelerating.
By month three, you'll notice the effects gradually fading. Hair that was completely straight might start showing slight waves. Frizz returns incrementally. By month four to five, you're back to baseline, the treatment has largely washed out and worn away. This is when most people retreat.
The longevity depends heavily on your maintenance routine. If you use sulfate-free shampoo and avoid chlorinated pools, results stretch closer to five months. If you wash with regular shampoo (which strips the treatment faster) or spend significant time in chlorine, results fade by month three. Heat styling doesn't destroy the treatment, but excessive blow-drying and flat ironing do accelerate fading.
One often-overlooked factor: the quality of your water. Hard water (high mineral content) accelerates fading. If you have hard water, installing a shower filter extends results noticeably. Soft water is gentler on treated hair.
Keratin Treatment Safety Precautions for Home Use
The primary safety concern with DIY keratin treatments is formaldehyde exposure. Modern formaldehyde-free treatments eliminate this risk entirely.
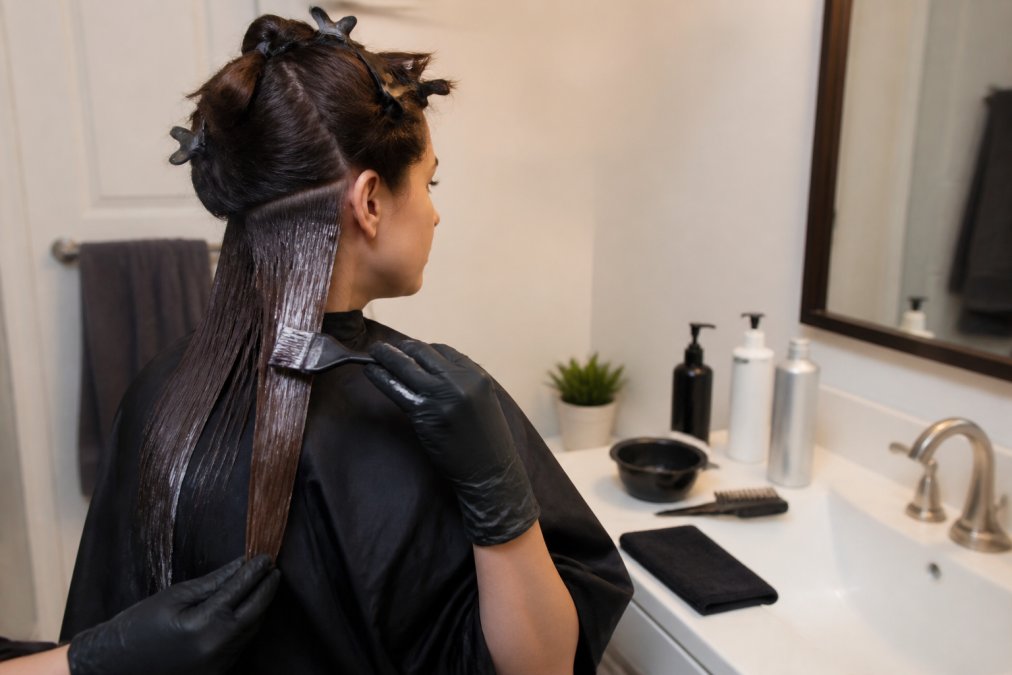
Kerarganic's formaldehyde-free keratin system uses glyoxyloyl keratin amino acids instead, which smooth hair without releasing harmful fumes. This means you can apply treatment in your bathroom without worrying about respiratory exposure.
That said, basic precautions still matter. Wear gloves during application to avoid skin irritation from the active ingredients.
Common Mistakes That Ruin DIY Keratin Results
Using the wrong water temperature during rinsing causes problems too. Rinse with lukewarm water, not hot. Hot water opens the hair cuticle and can wash out some of the treatment before it fully sets. Lukewarm water rinses the excess product without disrupting the treatment.
The Verdict: When DIY Keratin Treatment Makes Sense
Determining whether is diy keratin treatment worth the cost requires meeting these criteria: you have shoulder-length or longer hair, you're willing to invest 45 minutes to an hour in careful application, you can follow multi-step instructions precisely, and you'll commit to sulfate-free maintenance products afterward.
Frequently Asked Questions
Are there any at-home keratin treatments that actually work?
Yes. Formaldehyde-free DIY keratin treatments deliver measurable results when applied correctly. The Organic Keratin DIY Treatment Set from Kerarganic provides frizz control, hair smoothing, and improved manageability for up to 5 months. Success depends on following application steps precisely, using the correct flat iron temperature (400°F), and maintaining results with sulfate-free shampoos. Results vary by hair type and porosity, but users typically see noticeable texture softening and shine enhancement within days.
How long do at-home keratin treatments typically last?
Formaldehyde-free DIY keratin treatments last 4 to 5 months with proper maintenance. Longevity depends on how often you wash your hair, heat styling frequency, and whether you use sulfate-free products. Each wash degrades the treatment slightly, so limiting washing to 2 to 3 times weekly extends results. Products like the Organic Keratin System Premium are designed for long-lasting straightening when paired with appropriate post-treatment care.
What is the price difference between salon and DIY keratin treatments?
DIY kits range from $45.50 to $273.20 depending on bottle size and hair length. The Organic Keratin DIY Treatment Set (2oz) costs $45.50 for shoulder-length hair, while the 4oz set ($75.60) covers longer lengths. However, factor in repeat applications every 4 to 5 months: DIY saves $400 to $1,200 annually versus quarterly salon visits.
Is it safe to perform a keratin smoothing treatment at home?
Formaldehyde-free keratin treatments are safe for home use when you follow application precautions. Wear gloves to prevent skin irritation, apply only to clean, dry hair, and ensure proper ventilation. Avoid contact with eyes and scalp. Formaldehyde-free formulas eliminate the respiratory and health risks associated with traditional salon treatments, making them suitable for pregnant women and children. Always read product instructions and perform a patch test first if you have scalp sensitivity.
What are the common downsides of DIY keratin treatments?
The main risks include uneven application (leading to patchy results), incorrect flat iron temperature (causing hair damage or poor smoothing), and over-processing if you reapply too soon. Time commitment is significant: expect 3 to 4 hours for application, blow-drying, and flat ironing. Some users experience greasy hair if they use too much product or fail to rinse thoroughly. Results also depend heavily on hair type; fine or damaged hair may not hold the treatment as long as healthy hair.