
Last Updated: November 8, 2026
Quick Summary
Improving gray coverage with eco-friendly hair color means working with deposit-only formulas that coat the strand surface to blend and tint gray rather than erase it. Extend processing time, choose a shade one notch warmer, and prep hair properly to get the best gray coverage from plant-based color.
- Deposit-only color blends gray and adds shine but cannot lighten hair or fully hide dense, resistant gray.
- Always patch test 48 hours before and strand test the same day to find your personal processing time.
- Apply color to dry, clarified hair, since water dilutes deposit color and causes weak, uneven results.
- Most plant-based colors need 30 to 45 minutes, but your strand test overrides the package time.
- Skip shampoo for 48 hours after rinsing and wait at least two weeks before reapplying to the same area.
Table of Contents
- Why Eco-Friendly Color Covers Gray Differently
- How to Cover Gray Hair Naturally at Home
- Your Organic Hair Color Shade Guide for Gray Coverage
- Improving Gray Coverage Without Bleach
- Gray Hair Color Before and After: Setting Realistic Expectations
- Troubleshooting Resistant Grays and Uneven Results
- Building a Color-Maintenance Routine With Kerarganic
- Frequently Asked Questions
Why Eco-Friendly Color Covers Gray Differently
Gray coverage is the hardest test of any eco-friendly hair color. Most plant-based formulas work by depositing color on the surface of the strand, not by opening the cuticle and pushing pigment inside like conventional dye does. That single difference explains almost every result you will see.
The global hair color market is projected to reach USD 47.38 billion by 2034, per Fortune Business Insights market forecast, and a growing slice of that demand is for gentler formulas.
Deposit-Only Formulas and What They Can and Cannot Do
Deposit-only color sits on the outside of the hair. It adds tone, boosts shine, and blends gray into the surrounding color. It cannot lighten hair, and it cannot fully hide dense, resistant gray the way a permanent dye can.
A 2022 review found that plant dyes made from henna, curcumin, and Tagetes erecta extracts can work as direct dyes to color gray hair brown (PubMed Central review of plant colorants). That is real, useful coverage. It is also brown-leaning and translucent, not a blank slate.
What deposit-only color does well:
- Blends gray rather than erasing it
- Adds shine and warmth
- Avoids ammonia and harsh developers
- Fades gradually instead of growing out in a hard line
| Formula Type | How It Works | Gray Result | Best For |
|---|---|---|---|
| Deposit-only / plant-based | Coats the strand surface | Blends and tints | Low to moderate gray |
| Semi-permanent | Light deposit, no lift | Soft coverage | Early gray, root blending |
| Permanent | Opens cuticle, lifts and deposits | Full coverage | Resistant or high-percentage gray |
How to Cover Gray Hair Naturally at Home
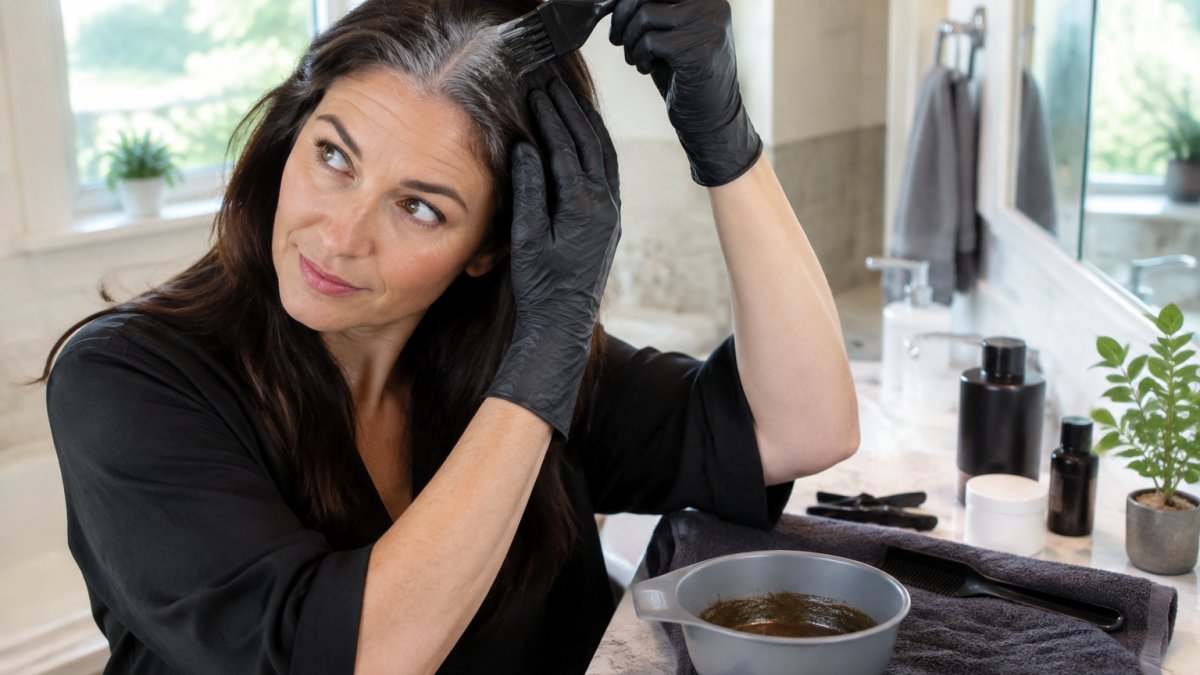
A complete at-home routine has seven stages: patch test, strand test, prep, section, apply, process, and rinse. Skipping any one of them can contribute to weak results on gray.
Stage 1: Patch Test (48 Hours Before)
Mix a small amount of color and apply it to the inner forearm or behind the ear. Leave it for the full processing time, rinse, and watch for redness, itching, or swelling over 48 hours. Repeat this every time you switch formulas, even between shades from the same brand, because plant dyes still contain potential sensitizers such as lawsone in henna.
Watch out: a patch test on the scalp is not a substitute for a forearm test, since scalp skin reacts differently and is harder to observe.
Stage 2: Strand Test (Same Day)
Cut a small lock from an inconspicuous area, bind it with a clip, and apply the mixed color exactly as you would to your head. Time it in five-minute increments and note when the gray strands reach your target tone. This tells you two things no box can: your personal processing time and whether the shade reads warm, cool, or flat against your natural color.
Stage 3: Prep
- Clarify with a sulfate-free shampoo and skip conditioner, since conditioner leaves a film that deposit color cannot grip.
- Dry hair fully. Water dilutes deposit color and is the single most common cause of weak, uneven results.
- Detangle gently and remove product buildup from the hairline and temples.
Stage 4: Section
Divide hair into four quadrants: two front, two back. Clip each section and work one at a time. Within each quadrant, part off half-inch subsections so every strand is exposed.
Stage 5: Apply
Start at the grayest zone, usually the hairline, temples, and part line, because those areas need the longest processing time. Apply from mid-length to ends first, then go back and do the roots last if your formula is a permanent or semi-permanent type that processes faster at the scalp. For deposit-only plant color, apply roots first and work outward. Use a tint brush for precision and gloves throughout. Maintaining the integrity of these treated strands requires a gentle cleansing routine, a philosophy championed by The Artisan Square to ensure that hidden sulfates do not compromise your color longevity.
Stage 6: Process
Most plant-based colors need 30 to 45 minutes, but your strand test overrides the package time. Cover with a shower cap to keep the formula from drying out, and use a heat cap for resistant strands, which helps the cuticle open slightly and take more pigment.
Stage 7: Rinse and Aftercare
Rinse with cool water until the water runs clear, then skip shampoo for 48 hours so the color can settle. Follow with a sulfate-free conditioner. Wait at least two weeks before reapplying to the same area, since repeated application on fresh deposit color can push the tone darker and flatter.
Timing by Zone
| Zone | Apply Order | Typical Extra Time |
|---|---|---|
| Hairline and temples | First | +5 to 10 minutes |
| Part line and roots | First or second | +5 minutes |
| Mid-length | Second | Standard |
| Ends | Last | Standard or 5 minutes less |
Watch out: applying to damp hair, skipping the strand test, or rushing the rinse are the three mistakes that most often turn a good formula into a patchy result.
Your Organic Hair Color Shade Guide for Gray Coverage
Shade choice should follow three inputs, not one: your gray percentage, your starting shade, and your hair texture. Use the table below as a decision guide, then confirm with a strand test.
Step 1: Find Your Gray Percentage
Part hair down the middle and look at the front hairline and part line, where gray shows first. Estimate the share of visible strands that are fully or mostly gray:
- Under 30%: scattered strands, mostly at the temples and part.
- 30% to 60%: clear gray at the hairline and part, with gray mixed through the top.
- Over 60%: gray dominates the front and top, with natural color mostly at the ends.
Step 2: Match Starting Shade and Texture
| Starting Shade | Texture | Best Shade Direction | Realistic Outcome |
|---|---|---|---|
| Dark brown to black | Fine | Warm brown, soft auburn | Near-natural blend at under 30% gray; visible warmth at 30% to 60% |
| Dark brown to black | Coarse or resistant | Warm brown, mahogany | Slower take; expect two applications for dense gray |
| Medium brown | Any | Warm brown, chestnut | Soft blend; gray reads as dimension rather than coverage |
| Blonde | Fine | Honey, golden blonde | Blends well; ash shades turn gray steely |
| Blonde | Coarse | Golden, warm beige | Patchiness is common; strand test first |
| Red or auburn | Any | Copper, warm mahogany | Best natural match; avoid cool reds |
Step 3: Set the Outcome Range by Gray Level
- Under 30%: near-natural blend, hard to spot in daylight.
- 30% to 60%: visible tint with gray showing through; expect a softer, dimensional finish rather than full coverage.
- Over 60%: tonal coverage that reads best when refreshed every three to four weeks; full erasure is not realistic with deposit-only color.
Step 4: Adjust for Fade
Translucent color cools as it fades, so go one shade warmer than your target if you are between 30% and 60% gray. If you are over 60% gray, choose the closest match to your natural tone and plan to refresh more often rather than going darker to compensate.
Watch out: choosing a shade two or more levels darker than your natural color to hide gray usually produces a flat, opaque result that grows out in a hard line.
Improving Gray Coverage Without Bleach
You do not need bleach to cover gray. Bleach lifts pigment; gray coverage needs deposit, not lift. Skipping bleach protects the cuticle and keeps fragile gray strands from snapping.
Improving gray coverage without bleach comes down to three levers: longer processing time, a warmer shade, and better prep. Add ten minutes to the developer time before you add a stronger formula. Warm the shade one notch if your gray reads flat. Clarify first so the color can actually attach.
For resistant strands, a heat cap during processing helps the cuticle open slightly and take more pigment.
Gray Hair Color Before and After: Setting Realistic Expectations
Expect blending, not erasure. Eco-friendly color on gray usually delivers softer, more natural-looking coverage with visible dimension. That is the appeal, and it is also the limit.
In daylight, translucent color can show more of the gray underneath. That is how deposit color behaves.
Realistic outcomes by gray level:
- Under 30%: near-natural blend, hard to spot
- 30-60%: visible tint with gray showing through
- Over 60%: soft, tonal coverage, best refreshed often
Troubleshooting Resistant Grays and Uneven Results
Resistant gray usually means the cuticle is tight and slick, so pigment slides off. The fix is mechanical before it is chemical: clarify, dry, and give the color more time.
Common problems and their causes:
- Warm or brassy result: shade too cool for translucent color
- Patchy coverage: uneven application or damp hair
- Fades in days: sulfate shampoo or hot water
- No change at all: processing time too short
If two attempts fail on the same patch, that area likely needs professional assessment. Persistent scalp reaction, burning, or swelling is a stop signal, not a tweak.
Building a Color-Maintenance Routine With Kerarganic
Coverage fades from the wash, not the clock. A color-safe routine keeps gray coverage fresh far longer than reapplying more often.
Wash less, rinse cool, and use sulfate-free products. Our sulfate-free color shampoo cleans gently without stripping deposit color, and the Color-Lock Mask seals tone back in whenever hair feels dry. If you want the full lineup in one purchase, the Color Care Guardian Collection Bundle covers the whole routine, and our professional color care guide maps out a week-by-week plan. Browse the full color care range to build your own.


Kerarganic formulas are built around keratin and plant-based ingredients.
Gray coverage with eco-friendly color is a skill, not a gamble. Learn your gray percentage, prep properly, and maintain with color-safe products. Kerarganic Cosmetics, LLC offers sulfate-free shampoo, a color-locking mask, and keratin-rich formulas that help your color last. Get started with Kerarganic and keep your gray coverage looking fresh between applications.
Frequently Asked Questions
Can eco-friendly hair dye cover resistant gray hair?
It can, but resistant grays usually need more processing time and a shade close to your natural color. Plant-based and deposit-only formulas work best when the hair is clean, product-free, and sectioned so the color reaches every strand. Plant dyes such as henna can color gray hair brown. If a strand test shows weak pickup after the full application time, book a salon consultation rather than layering more product.
Is it better to go lighter or darker to hide gray hair?
Darker shades generally give stronger gray coverage because they deposit more pigment over white strands. Going lighter can leave grays looking brassy or translucent unless the formula is built for high-lift coverage. A practical middle ground is to match your natural shade or go one level darker, then adjust after a strand test. If more than half your hair is gray, a shade close to your natural tone blends regrowth better between appointments.
How do I prepare gray hair for hair color at home?
Wash with a clarifying shampoo 24 hours before coloring so oils and buildup do not block pigment, then skip conditioner on the day of application. Do a patch test 48 hours ahead on your inner arm, and a strand test on a small section to check timing. Section hair into four parts and apply to the resistant areas first. Keep the bathroom warm, since low room temperature slows color processing on gray strands.
How long should hair color stay on gray roots?
Most at-home formulas need the full manufacturer time, typically 30 to 45 minutes, and gray roots often need the longer end of that range. Apply color to roots first and give them a head start before pulling through the lengths, which process faster. Do not exceed the label time to chase a darker result. After rinsing, use a sulfate-free, color-safe wash and a deep conditioning mask to seal the cuticle and slow fading.
