
Table of Contents
- Quick Comparison: At-Home Keratin Treatments for Beginners
- How We Evaluated These At-Home Keratin Treatments
- 1. Organic Keratin DIY Treatment Set (4oz) - Best Complete Kit for Beginners
- 2. Organic Keratin DIY Treatment Set (2oz) - Best Budget Starter Kit
- 3. Organic Keratin System Step 2 - Best for Damaged or Over-Processed Hair
- 4. Organic Keratin System Premium Step 2 - Best Professional-Grade At-Home Option
- How to Apply Keratin Treatment at Home: Step-by-Step for Beginners
- Keratin Treatment Aftercare Tips to Make Results Last
- How Long Does At-Home Keratin Last?
- Frequently Asked Questions
Last Updated: September 16, 2026
Quick Comparison: At-Home Keratin Treatments for Beginners
The best at-home keratin treatment for most beginners is the Organic Keratin DIY Treatment Set (4oz) from Kerarganic Cosmetics, LLC, a three-step formaldehyde-free system that includes everything needed for one full application. At $75.60, it pairs a pre-treatment cleanser, the keratin formula itself, and a finishing argan oil mask.

| Product | Price | Size | Best For | Key Feature |
|---|---|---|---|---|
| DIY Treatment Set (4oz) | $75.60 | 4oz x3 | Most beginners | Complete 3-step system |
| DIY Treatment Set (2oz) | $45.50 | 2oz x3 | Shoulder-length hair | Budget starter kit |
| Organic Keratin System Step 2 | $55.10 | Single bottle | Damaged or over-processed hair | 24kt gold nanoparticles |
| Organic Keratin System Premium Step 2 | $158.60 | Single bottle | Professional-grade results | Up to 5 months of smoothness |
How We Evaluated These At-Home Keratin Treatments
We judged each system on five factors: formaldehyde content, ease of application for a first-timer, hair-type compatibility, cost per application, and whether the kit includes the prep and sealing steps beginners tend to skip. Formaldehyde-free formulas ranked highest because the FDA information on formaldehyde in hair smoothing products flags the chemical as a known carcinogen when heated during treatment, and heat is not optional in a keratin service.
What "formaldehyde-free" actually means on a label
A bottle can say "formaldehyde-free" and still contain a formaldehyde-releasing agent that breaks down when heated. Common ones to scan for:
- Methylene glycol and methylene oxide, both are formaldehyde under a different name.
- Formalin, a stabilized formaldehyde solution.
- Paraformaldehyde, a solid polymer that releases formaldehyde when heated.
- Glyoxylic acid, not formaldehyde, but a newer smoothing acid that can irritate the scalp and eyes, especially on broken skin.
- DMDM hydantoin and imidazolidinyl urea, preservatives that slowly release small amounts of formaldehyde over time.
The ventilation question
Even a genuinely formaldehyde-free formula can carry a strong odor from its acids and proteins, and a closed bathroom is the wrong room for any keratin application. A common at-home setup: an open window, a box fan pointed outward, and the bathroom door left open. If you can smell the product through a closed door, you do not have enough ventilation.
Patch test before you commit
No competitor guide we reviewed tells beginners to patch test, yet it is the cheapest way to avoid a bad reaction. Twenty-four hours before a full application, apply a dime-sized amount behind one ear or on the inner forearm, let it sit the full processing time, and rinse. Redness, itching, or burning means do not proceed. This matters more at home than in a salon, where a stylist watches your scalp in real time.
Why we weighted ease of application so heavily
A $158 treatment a beginner cannot apply correctly is worth less than a $45 kit that works. Completeness was the other deciding factor: a kit with a pre-treatment cleanser and post-treatment mask removes guesswork, while a standalone bottle tempts beginners to skip prep and sealing, so the treatment fades faster. Every product below is formaldehyde-free and built for home use.

1. Organic Keratin DIY Treatment Set (4oz) - Best Complete Kit for Beginners
Our top pick for a first at-home keratin treatment is this 4oz, three-step set, which removes the biggest beginner mistake: treating hair without cleansing it first.
Pros:
- Complete system, nothing extra to buy
- Formaldehyde-free, so no fume concerns
- Includes argan oil mask for post-treatment hydration
Cons:
- One application per set, so long-term use means repurchasing
- 4oz may be more than short hair needs
2. Organic Keratin DIY Treatment Set (2oz) - Best Budget Starter Kit
If you have shoulder-length hair and want to test whether at-home keratin suits you before committing to a larger kit, the 2oz set is the sensible start.
Pros:
- Lowest entry price in the lineup
- Same three-step process as the full-size kit
- Ideal for testing compatibility with your hair
Cons:
- Sized only for shoulder-length hair
- Higher cost per ounce than the 4oz set
3. Organic Keratin System Step 2 - Best for Damaged or Over-Processed Hair
Over-processed hair needs protein rebuilt into the shaft, and this standalone Step 2 formula is built for exactly that. It contains hydrolyzed keratin, silk amino acids, hydrolyzed collagen, and hydrolyzed wheat protein to restore elasticity and reduce breakage in hair weakened by repeated color or heat treatments, plus 24kt gold nanoparticles. At $55.10, it is a single-bottle treatment, so you supply your own pre-treatment shampoo and post-treatment mask, better suited to someone who already owns a sulfate-free cleanser.

Pros:
- Protein-rich formula for damaged hair
- Contains argan oil, shea butter, and coconut oil
- Formaldehyde-free
Cons:
ORGANIC KERATIN DIY TREATMENT SET →
- No pre-treatment or post-treatment products included
- Requires more knowledge of the full process
4. Organic Keratin System Premium Step 2 - Best Professional-Grade At-Home Option
For the beginner who wants salon-level results and is willing to pay for them, this premium formula is the strongest option in the lineup.
Pros:
- Longest-lasting results in the lineup
- Suitable for all hair types and textures
- Professional-grade formula for home use
Cons:
- Highest price point
- Sold as a single step, not a full kit
How to Apply Keratin Treatment at Home: Step-by-Step for Beginners
Learning how to apply keratin treatment at home comes down to six repeatable steps, which take roughly 90 minutes for medium-length hair.
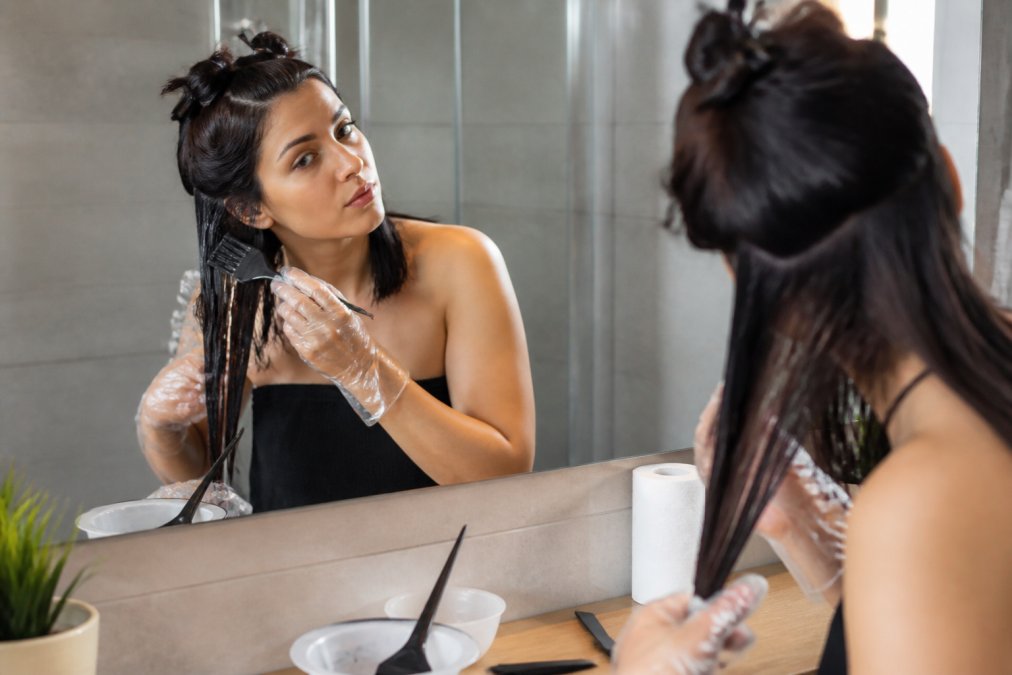
- Wash with the pre-treatment shampoo. Clean hair lets the keratin bond evenly. Skip conditioner at this stage.
- Dry the hair completely. The formula goes on dry hair, so blow dry fully before starting.
- Section the hair. Divide into two or four sections and clip them out of the way.
- Apply from the nape upward. Use an application brush or your fingers, working root to tip, then comb through with a fine-toothed comb. Let it process for about 10 minutes.
- Blow dry to about 90%. Rough-dry first, then finish with a brush for smoothness.
- Flat iron in small strands at 400°F. Iron each strand four to six times from root to middle, then four to six times from root to tip.
Keratin Treatment Aftercare Tips to Make Results Last
Aftercare decides whether results last weeks or months. The most important rule: switch to a sodium chloride-free, sulfate-free shampoo, because salt and sulfates strip the keratin layer off the hair shaft.
A few habits protect your investment:
- Wash with a sulfate-free, salt-free shampoo, ideally two to three times a week rather than daily.
- Use a post-treatment mask or deep conditioner weekly to reinforce moisture retention.
- Apply a keratin sealing spray before blow drying and ironing to support cuticle sealing.
- Avoid clarifying shampoo for the first few weeks, since it removes the treatment along with buildup.
- Reduce heat styling where you can, and always use heat protection when you cannot.
How Long Does At-Home Keratin Last?
Most at-home keratin treatments last two to five months, depending on the formula, your hair type, and how well you maintain it.
Porosity is the variable nobody talks about
Two people can use the same kit on the same day and get results three weeks apart. The difference is usually porosity, how open each hair strand's outer layer is.
- Low porosity hair has a tight, flat cuticle. It resists absorbing the formula, so it can look under-treated on day one, but once the keratin is in, it holds for a long time.
- Medium porosity hair is the sweet spot. It absorbs evenly and releases slowly, which is why most "up to 5 months" claims are written around this hair type.
- High porosity hair has a raised, porous cuticle from color, bleach, or heat damage. It drinks the formula in fast and looks great immediately, then releases it just as fast. High-porosity hair often needs reapplication in six to eight weeks, not five months.
Troubleshooting a treatment that did not work
This is what beginners search for the night after a failed application, and almost no guide addresses it. Here is what each failure mode means and what to do.
Frequently Asked Questions
Are there any at-home keratin treatments that actually work?
Yes, formaldehyde-free at-home keratin treatments can smooth hair and reduce frizz when applied correctly. Results depend on your hair type and application technique. Kerarganic's Organic Keratin System uses glyoxyloyl carbocysteine and hydrolyzed keratin to smooth the hair shaft without harsh chemicals. For beginners, the DIY Treatment Set ($75.60) includes pre-treatment shampoo, keratin treatment, and post-treatment mask for a complete first application.
Can I do a keratin treatment myself at home?
You can do a keratin treatment at home, but it requires patience and careful sectioning. Start with clean, dry hair. Divide hair into 2 or 4 sections. Apply the product from root to tip with a brush, then comb through. Let it process for about 10 minutes, blow dry to 90%, then flat iron at 400°F in small strands. The Kerarganic Organic Keratin System ($55.10) is designed for at-home use and includes detailed instructions.
What should beginners look for in a formaldehyde-free keratin treatment?
Look for formulas that list hydrolyzed keratin, silk amino acids, and argan oil. Avoid products with formaldehyde or formaldehyde derivatives. Check that the treatment comes with clear step-by-step instructions and post-treatment care products. Kerarganic's Organic Keratin System is formaldehyde-free and includes glyoxyloyl carbocysteine, hydrolyzed keratin, and argan oil. The DIY Treatment Set includes all three steps for beginners.
How long do at-home keratin treatments typically last?
At-home keratin treatments can last up to 5 months with proper aftercare, according to Kerarganic's product information. Longevity depends on how often you wash your hair and the products you use. Switch to a sodium chloride-free and sulfate-free shampoo like Kerarganic's Keratin Shampoo Maintenance ($14.60). Avoid washing your hair for 72 hours after treatment to let the keratin fully set.
How do I maintain my hair after an at-home keratin treatment?
Use sulfate-free and sodium chloride-free shampoo to prevent stripping the treatment. Kerarganic's Keratin Shampoo Maintenance ($14.60) is salt and sulfate-free. Apply a post-treatment mask once a week, like the Keratin Post-Treatment Mask ($12.50), to reinforce the keratin and prolong results. Avoid washing your hair for 72 hours after application. Use heat protection when styling and minimize exposure to chlorine and saltwater.