
Table of Contents
- Signs of Heat Damaged Hair vs. Simple Frizz
- Step 1: Test Your Hair Porosity Before You Buy Products
- Step 2: Switch to a Gentle, Sulfate-Free Cleansing Routine
- Step 3: Repair the Hair Shaft with Bond-Building and Deep Conditioning
- Step 4: Seal the Cuticle with a Leave-In Treatment and Serum
- Keratin Treatment Benefits for Frizzy Hair: What It Actually Fixes
- Your Maintenance Hair Care Routine for Damaged Hair
- What to Avoid When Repairing Damaged Hair
- Frequently Asked Questions
Last Updated: September 6, 2026
Frizzy, damaged hair is rarely one problem. It is usually a combination of a compromised hair cuticle, lost internal moisture, and broken protein bonds. Learning how to repair frizzy damaged hair starts with understanding which issue drives your specific texture, because treating the wrong one wastes time and money. At Kerarganic Cosmetics, LLC, we formulate professional keratin and bond-repair systems, and our first piece of advice is always the same: diagnose before you buy.

The most effective repair strategy is a structured routine that rebuilds internal structure and then seals the cuticle to lock in moisture. Below, we walk through a step-by-step method addressing porosity, cleansing, bond repair, and sealing.
Signs of Heat Damaged Hair vs. Simple Frizz
Heat damaged hair is a structural injury, while simple frizz is usually a surface moisture issue. The distinction matters because the repair protocols are different.
Heat damage occurs when high styling temperatures break the protein bonds inside the hair shaft, leading to a loss of elasticity and eventual split ends. If your hair stretches and does not bounce back, or feels mushy when wet, the internal structure is compromised. Simple frizz, by contrast, occurs when the cuticle is raised, allowing moisture to escape and humidity to enter, causing swelling and uneven texture.
A quick check: if your hair is frizzy but holds a curl and feels smooth when dry, you likely have a cuticle and hydration problem. If your hair feels rough, breaks easily, or has changed texture permanently at the ends, you are dealing with thermal damage. Many people have both, which is why the repair steps below address each layer of the hair fiber.

Step 1: Test Your Hair Porosity Before You Buy Products
Hair porosity is the single most useful diagnostic for choosing repair products. Porosity refers to how well your hair absorbs and retains moisture, determined by the state of the cuticle. Chemically processed or heat styled hair is typically high porosity, meaning the cuticle is lifted and moisture escapes quickly.
A common approach is the float test: place a clean strand of hair in a glass of water. If it floats for a few minutes before sinking, you have medium porosity. If it sinks immediately, the cuticle is highly porous. Low porosity hair floats for a long time because the cuticle lies flat and repels water.
Your porosity determines product weight. High porosity hair needs protein treatments and heavier sealing agents to fill gaps in the cuticle. Low porosity hair needs lightweight, water-based products that do not cause buildup. This test prevents the common mistake of buying rich creams that leave fine hair greasy or lightweight serums that do nothing for coarse, damaged strands.
Step 2: Switch to a Gentle, Sulfate-Free Cleansing Routine
Sulfate shampoos strip the hair of its natural lipid barrier, accelerating moisture loss and worsening frizz. Switching to a sulfate-free cleanser is the foundation of any hair repair routine. But not all sulfate-free shampoos are equal, and the way you wash matters as much as the product you choose.
What to Look For in a Cleanser
Sulfates, sodium lauryl sulfate (SLS) and sodium laureth sulfate (SLES), are strong detergents that create a rich lather but remove the oils that keep the cuticle flexible (peer-reviewed research). For damaged hair, this is counterproductive. Instead, look for gentle surfactants like sodium cocoyl isethionate, cocamidopropyl betaine, or decyl glucoside, which clean without lifting the cuticle further. Avoid any shampoo that lists "sulfate" in the first five ingredients, and be wary of "sulfate-free" formulas with harsh alternatives like sodium methyl cocoyl taurate in high concentrations.
The Role of Water Hardness
Your water quality can sabotage your cleansing routine. Hard water, high in calcium and magnesium, leaves mineral deposits that make hair feel rough, dull, and more prone to frizz (peer-reviewed research). If you notice soap scum in your shower or your shampoo doesn't lather well, you likely have hard water. A showerhead filter with a chelating agent like EDTA can help, but it won't remove all minerals. For a deeper reset, use a clarifying shampoo with EDTA once a month to rinse away mineral buildup, especially if you swim in chlorinated pools or live in areas with known hard water.
How Often to Wash
For dry, damaged hair, washing two to three times per week is usually sufficient. Over-washing strips the minimal moisture you have worked to retain. In between, use a dry shampoo or rinse with water and apply a lightweight conditioner to the ends. If your hair is high porosity, you may need to co-wash (conditioner-only washing) once a week. If your hair is low porosity, you might need a gentle sulfate-free shampoo more often to prevent buildup.
Technique Matters
How you apply shampoo also affects frizz. Focus the shampoo on the scalp, not the lengths. The suds that run down the hair shaft are enough to cleanse the mid-lengths and ends. Use your fingertips, not your nails, to massage the scalp in small circles. Rinse with lukewarm water, hot water opens the cuticle and accelerates moisture loss. A final cool water rinse can help flatten the cuticle and boost shine.
By choosing the right cleanser, accounting for your water, and adjusting your frequency, you set the stage for the repair steps that follow.
Step 3: Repair the Hair Shaft with Bond-Building and Deep Conditioning
Bond-building treatments and deep conditioning masks address two different layers of damage, and you need both for lasting repair. Bond builders work inside the hair shaft to reconnect broken disulfide bonds, the structural links that give hair its strength. Deep conditioners replenish moisture and lipids in the cortex.
The distinction is critical: a deep conditioner makes hair feel soft temporarily, but it does not restore structural integrity. If your hair is breaking or feels elastic when wet, you need a bond repair treatment first. Products containing plant-based ceramides and hydrolyzed proteins help rebuild the fiber from within.
A weekly deep conditioning mask is non-negotiable for damaged hair. Apply it to damp, towel-dried hair, focusing on the mid-lengths and ends. Leave it on for the recommended time, usually 10 to 20 minutes. For severely damaged hair, a reconstructing treatment like KERAR-PLEX STEP 2 GEL BOND & HAIR FIBER RECONSTRUCTOR from Kerarganic works to revive dry, dull strands caused by broken bonds and damaged fibers.
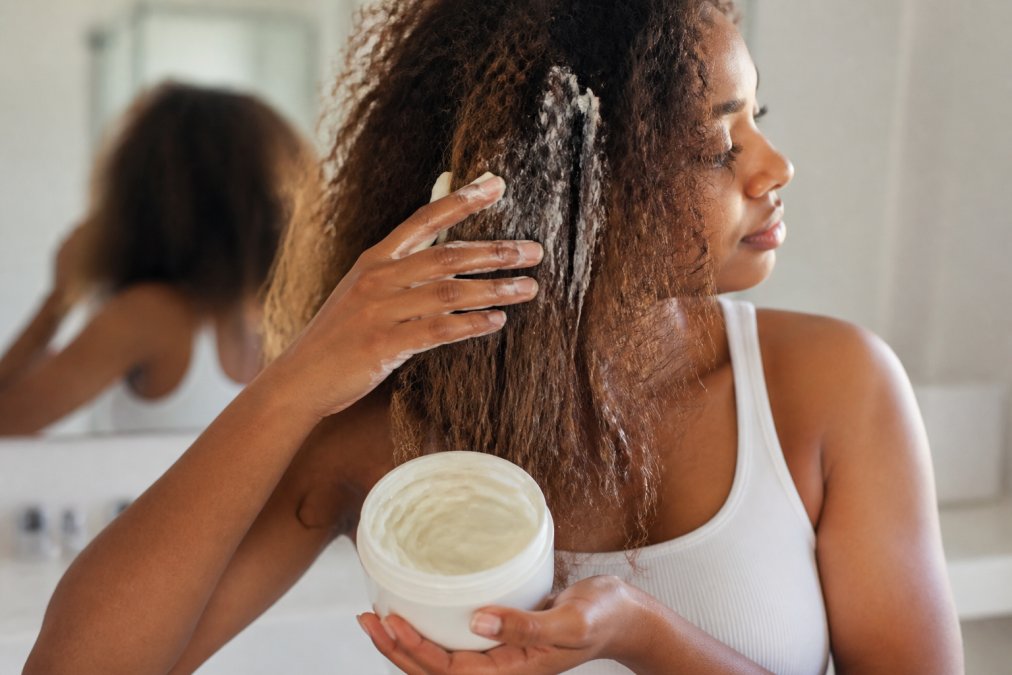
Step 4: Seal the Cuticle with a Leave-In Treatment and Serum
After repairing the internal structure, you must seal the cuticle to lock in moisture and prevent humidity from re-entering the hair shaft. This is where leave-in treatments and finishing serums earn their keep.
A leave-in conditioner provides a base layer of hydration and detangling slip, applied to damp hair before styling. The serum, applied last, acts as the occlusive layer that smooths the cuticle and reflects light, creating visible shine.
The difference between a good serum and a great one comes down to the oils and molecular weight. Lightweight oils like argan or camellia penetrate slightly, while heavier oils sit on the surface. A biolaminating serum, such as the FIBERPLASTY BIOLAMINATING ANTI-FRIZZ SERUM, is engineered to laminate the surface of the hair fiber, repairing damaged cuticles and keeping fibers aligned to tame frizz and flyaways.

Keratin Treatment Benefits for Frizzy Hair: What It Actually Fixes
Keratin treatment benefits for frizzy hair are often misunderstood. A keratin treatment does not permanently straighten hair; it fills gaps in the cuticle with a protective protein layer that smooths the hair shaft and reduces frizz.
The treatment works by applying a keratin-based formula that is then sealed with heat, temporarily bonding the protein to the hair and creating a smooth outer layer. The result is hair that is easier to dry, less reactive to humidity, and visibly shinier. For those with curly or textured hair, it does not make hair stick-straight; it relaxes the curl pattern and makes the texture more manageable.
Kerarganic offers formaldehyde-free keratin treatments, a critical consideration since many salon treatments rely on formaldehyde-releasing ingredients to set the protein. Professional-quality, formaldehyde-free options deliver smoothing results without the harsh chemicals. The FIBERPLASTY 3 STEP DAMAGED HAIR TREATMENT & BOTOX BUNDLE provides a complete system for salon-grade repair and smoothing at home.
Your Maintenance Hair Care Routine for Damaged Hair
A repair routine is only as good as the maintenance that follows. The goal is to protect the new bonds and smoothed cuticle from the daily stressors that caused the damage.
A sustainable weekly schedule looks like this:
- 2-3 times per week: Sulfate-free shampoo and conditioner
- 1 time per week: Bond-building or protein treatment
- 1 time per week: Deep conditioning mask
- Daily: Leave-in conditioner and a small amount of sealing serum on the ends
Heat styling should be minimized, and when you do use heat, always apply a heat protectant first. Keep the temperature below 350°F for fine hair and below 400°F for coarse hair (the American Academy of Dermatology). Air drying is the gentlest option, but if you must blow dry, use a nozzle to direct airflow down the hair shaft, which helps keep the cuticle flat.
| Routine Step | Frequency | Purpose |
|---|---|---|
| Sulfate-free cleanse | 2-3 times per week | Remove buildup without stripping lipids |
| Bond or protein treatment | Weekly | Rebuild internal hair structure |
| Deep conditioning mask | Weekly | Replenish moisture and elasticity |
| Leave-in + serum | Daily | Hydrate and seal the cuticle |
What to Avoid When Repairing Damaged Hair
Several common habits undermine repair efforts, and avoiding them is as important as the products you use. Beyond towel-drying and brushing mistakes, you must also protect your hair from environmental aggressors that silently worsen frizz and damage. Here’s how to sidestep the biggest culprits.
Mechanical Damage: Towels, Brushes, and Pillowcases
Aggressive towel drying is a top cause of cuticle damage. Rubbing wet hair with a cotton towel creates friction that lifts the cuticle and leads to breakage. Instead, use a microfiber towel or an old cotton t-shirt to gently squeeze out excess water. Never twist or wring your hair.
Brushing wet hair with a fine-tooth comb is another common error. Wet hair is at its most elastic and weakest state, so it breaks easily. Use a wide-tooth comb or detangling brush starting from the ends and working upward. Avoid brushing from the roots down, which forces tangles into knots.
Sleeping on cotton pillowcases absorbs moisture and creates friction, leaving you with frizzy, tangled hair in the morning. A silk or satin pillowcase reduces friction and helps maintain your style and moisture balance. If you don't want to switch pillowcases, wrap your hair in a silk scarf or bonnet before bed.
Environmental Damage: UV, Chlorine, and Hard Water
Most repair routines ignore the environment, but sun, chlorine, and hard water are silent saboteurs. UV rays break down the hair's protein structure, leading to dryness, color fading, and increased porosity. If you spend time outdoors, wear a hat or use a leave-in product with UV filters, such as benzophenone-4 or ethylhexyl methoxycinnamate.
Chlorine in pools is a strong oxidizer that strips the hair of its natural oils and can react with copper to create a green tint on blonde hair. Before swimming, wet your hair with clean water and apply a leave-in conditioner to create a barrier. After swimming, rinse immediately and use a gentle clarifying shampoo to remove chlorine residue.
Hard water, high in calcium and magnesium, leaves mineral deposits that make hair feel rough and dull. Over time, these minerals can build up and prevent conditioners from penetrating. A showerhead filter with a chelating agent like EDTA can help, but for a deeper reset, use a clarifying shampoo with EDTA once a month. If you live in an area with known hard water, this step is non-negotiable for frizz control.
Product and Heat Mistakes
Avoid using too much protein. While protein treatments are essential for rebuilding bonds, overdoing them makes hair stiff and brittle. Stick to a weekly schedule and alternate with moisture masks. Also, avoid layering heavy oils over lightweight leave-ins, this can create a barrier that blocks moisture. The order should be: leave-in conditioner, then oil or serum, then styling product.
Heat styling should be minimized, and when you do use heat, always apply a heat protectant first. Keep the temperature below 350°F for fine hair and below 400°F for coarse hair. Air drying is the gentlest option, but if you must blow dry, use a nozzle to direct airflow down the hair shaft, which helps keep the cuticle flat.
Patience and Consistency
Finally, be patient with the process. Repairing the hair shaft takes time because you are waiting for new growth and strengthening the existing fiber. Most people notice a difference in texture within a few weeks, but full recovery of severely damaged hair takes several months of consistent care. The most damaging thing you can do is abandon the routine after two weeks because you do not see instant results. Track your progress with photos every month to stay motivated.
Frequently Asked Questions
Can damaged hair be fully repaired?
Once the hair fiber is broken, it cannot be truly 'healed' back to its original state because it is no longer living tissue. However, you can repair the appearance and strength of frizzy damaged hair significantly. Bond-building treatments and products with ceramides and keratin fill in gaps along the hair shaft, while regular trims remove the worst of the split ends. The goal is to rebuild the fiber's structure enough to prevent further breakage and restore a smooth, shiny texture.
How often should I use deep conditioning treatments for damaged hair?
For moderately to severely damaged hair, use a deep conditioning mask or reconstructor once a week. If your hair has high porosity from chemical processing or heat styling, you may benefit from doing this every 3 to 4 days initially. Over-moisturizing low-porosity hair can lead to limpness, so adjust frequency based on how your strands respond. A protein-based bond reconstructor, like KERAR-PLEX Step 2, can be used every other week to reinforce the hair structure.
What is the best thing to do for dry, damaged, frizzy hair?
The best approach combines three actions: cut back on heat styling, switch to sulfate-free shampoo, and introduce a dedicated repair step. Sulfates strip the hair of natural oils, worsening dryness. Use lukewarm water and focus shampoo on the scalp only. Follow with a bond-repairing mask to fill gaps in the cuticle. After rinsing, apply a leave-in serum while hair is damp to seal the cuticle and lock in moisture, which is the most direct way to control frizz.
Are there specific ingredients to avoid if my hair is frizzy and damaged?
Yes. Avoid shampoos and conditioners that list sulfates, such as sodium lauryl sulfate or sodium chloride, as these strip moisture and rough up the hair cuticle. Also steer clear of drying alcohols like isopropyl alcohol, which can be found in some styling sprays. If you have color-treated hair, avoid harsh salts that fade color. Instead, look for products with plant-based ceramides, hyaluronic acid, and hydrolyzed keratin, which target moisture retention and fiber repair.
How do I know if I have heat damage or just regular frizz?
Regular frizz often appears in humid weather but usually settles when you apply a styling cream or serum. Heat damage is more permanent. Signs of heat damaged hair include split ends that travel up the shaft, a straw-like texture that feels dry even after conditioning, and hair that breaks off when you brush it. If your hair is limp at the root but frizzy at the ends, or if your natural curl pattern looks distorted, heat has likely altered the hair's protein structure.
What is the correct order to layer hair repair products?
The order matters for results. Start with a bond-repairing shampoo to cleanse, then apply a reconstructor or deep mask and leave it on for the recommended time. Rinse thoroughly. On damp, towel-dried hair, apply a leave-in conditioner to add moisture. Finally, seal everything in with a few drops of a nourishing serum or oil, concentrating on the mid-lengths and ends. This locks moisture inside the shaft and prevents frizz from forming as the hair dries.
Repairing frizzy, damaged hair requires a diagnostic approach that addresses porosity, internal bond strength, and cuticle sealing in the right order. Kerarganic Cosmetics, LLC provides the professional-grade tools for this process, including formaldehyde-free keratin treatments, bond reconstructors, and biolaminating serums that rebuild strength and eliminate frizz without harsh salts or sulfates. Get started with Kerarganic and build a routine that restores your hair from root to tip.